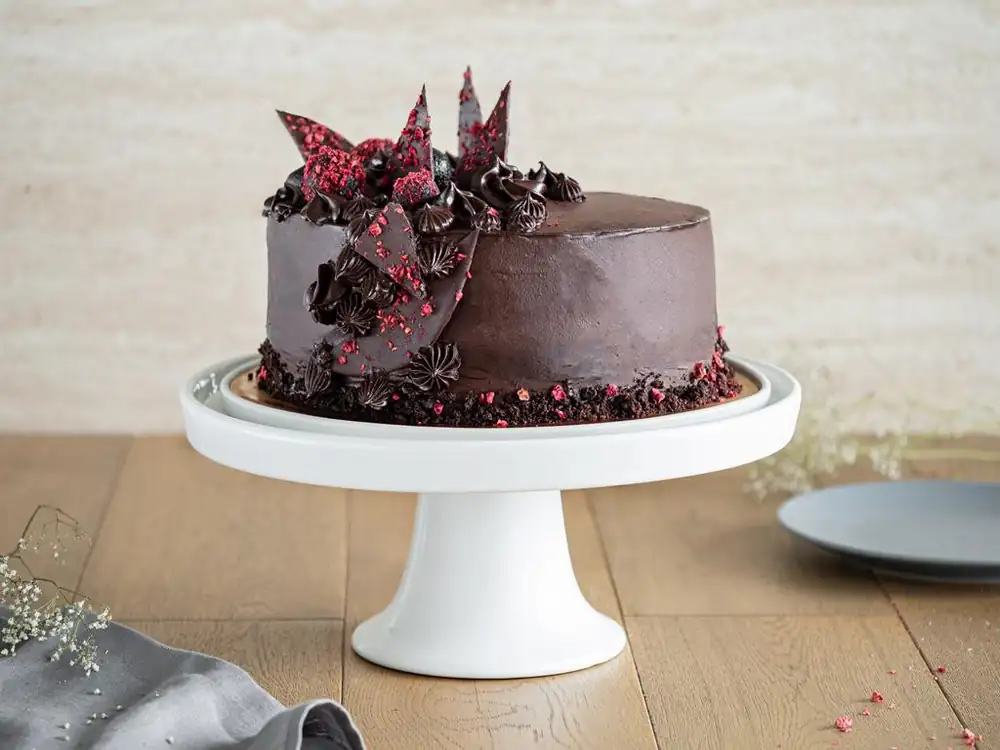
Vegan chocolate cake
If the kitchen is your kingdom, and your family and friends have long known that the most delicious desserts are served in your home, then the vegan chocolate cake challenge is for you! Will you take up the (kitchen 😉) gauntlet? 😊.
Preparing the vegan sponge cake and covering it with chocolate frosting takes a bit of patience, but the end result is stunning! The cake tempts with its unique sweetness and melt-in-your-mouth texture.
Time needed to prepare the recipe
Difficulty level
Difficult
Chocolate cake toppers (vegan):
Step 1
Step 2 In the bowl of a food processor, place the sugar, wheat flour, cocoa powder, baking powder and ground flaxseed and mix.*
Step 3 Separately, whisk together the oil, water, and vanilla extract. Add the wet ingredients to the dry ingredients and mix until just combined.
Step 4 Pour the batter into two baking tins and place in an oven preheated to 180°C (350°F). Bake for 40-45 minutes, or until a skewer inserted into the center comes out clean.
Step 5: Set the chocolate cake aside to cool completely. Once cooled, carefully trim the top of the sponge cake and cut each layer into two layers. Transfer the "top" cake to a bowl. Later, you can make pralines from it for decoration.
A string cake cutter may be useful, as it uses a flexible wire to cut the cake evenly. Its sturdy plastic legs provide stability while cutting.
Punch for vegan cake:
Step 6 Mix water, vodka, and lemon juice. Soak all the sponge cake layers with the prepared punch.
Step 7 Layer 3 vegan layers with blackcurrant jam.
Vegan chocolate cream:
Step 8: Open the can of chilled coconut milk and skim off the cream (the hard part that should separate from the coconut milk once chilled). Start whisking until smooth and fluffy.
Step 9 Mix powdered sugar with cream fixer and add to the cream. Continue beating until combined.
Step 10 While whisking constantly, add the melted chocolate in a thin stream.
Step 11 The cream should be thick enough to spread over the cake. If it isn't, place it in the refrigerator for 5-10 minutes to firm up a bit.
Step 12 Spread the cream over the cake layers soaked and layered with jam.
Step 13 Use the remaining cream to cover the sides and top of the cake. Refrigerate the prepared cake for at least an hour.
Vegan butter cream:
Step 14: Place the room-temperature vegan butter in the bowl of a food processor. Switch the mixer to the paddle attachment. Add the powdered sugar and process until well combined.
Step 15 Add cocoa and continue mixing.
Step 16 The mixture may be more liquid than traditional buttercream. This depends on the vegan butter used. If it's too liquid, refrigerate the mixture. It should set in about 15 minutes.
Step 17 Cover the cake with the frosting. Reserve some of the frosting for decoration. You can sprinkle the bottom sides of the cake with crumbs from the cake base.
Decorating the cake:
Step 18 Mix the remaining dough with a spoonful of butter cream.
Step 19 Form the mixture into balls of various sizes. Roll some of them in the dried, crushed raspberries. Set aside in the refrigerator.
Step 20: Spread the melted chocolate on a baking sheet lined with parchment paper and sprinkle with freeze-dried raspberries. Refrigerate for a few minutes to set. Then cut into triangles and return to the refrigerator.
Step 21 Place the truffles on the cooled cake and sprinkle with crushed, freeze-dried raspberries, if desired.
Step 22 Gently place the chocolate triangles into the cake.
Step 23
Marta recommends NXT Dairy-Free Dark Chocolate, which has a balanced flavor with intense notes of cocoa and a hint of red fruit. It's the perfect chocolate to enjoy on its own or for creating vegan sweets. It's the perfect chocolate for all your vegan, plant-based, and dairy-free recipes—even for those with lactose intolerance or milk allergies.
Worth knowing:
⭐ Before opening, coconut milk should be refrigerated for at least 12 hours. This will allow the cream to separate easily from the rest of the milk.
⭐ If you don't have two identical tins, divide the dough in half before preparing and bake in batches.
⭐ You can grind flaxseed using the TastyMoments attachment or in a coffee grinder.