Crispy Teriyaki Chicken (Authentic Japanese Method)
Finally, the perfect teriyaki recipe! It’s AUTHENTIC, simple teriyaki without any extraneous ingredients and with the perfect ratio.
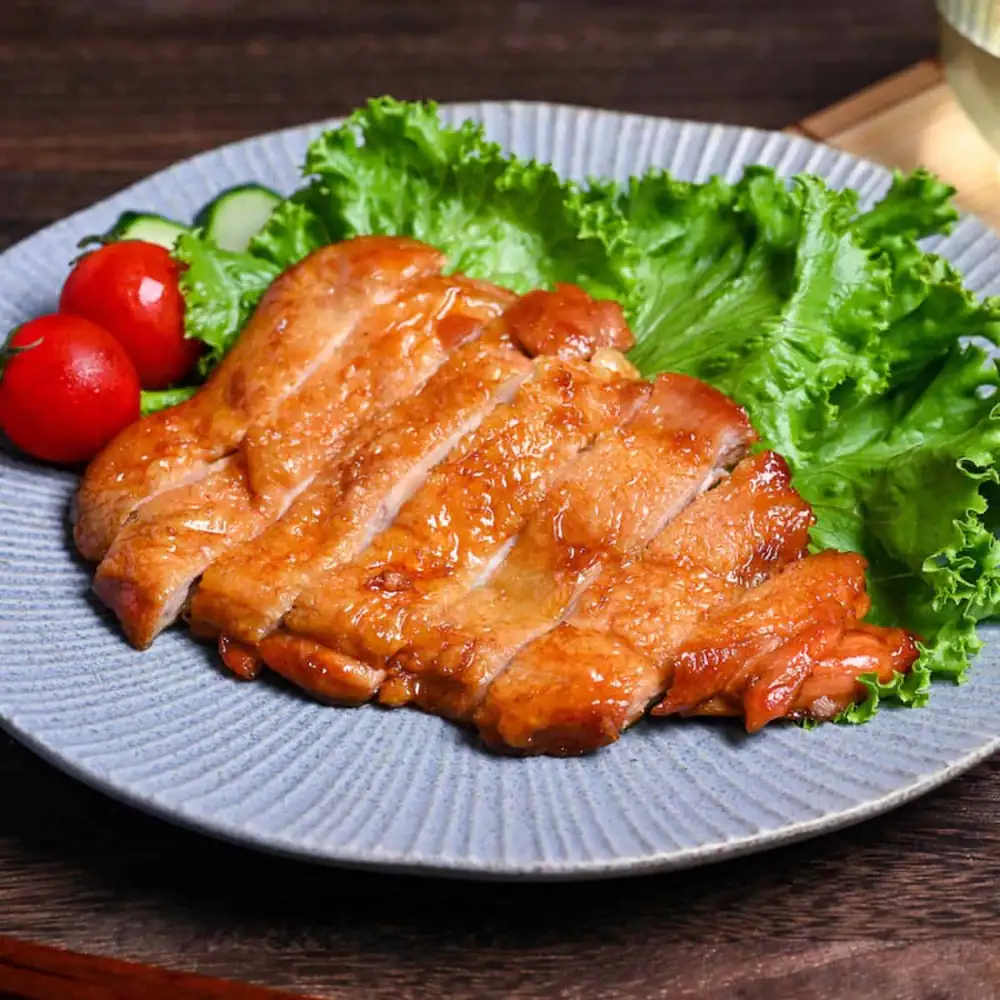
- 450 g boneless chicken thigh (skin-on, roughly two whole thighs, can be up to 600g if your pan is big enough)
- 4 pinches salt (1 pinch for each side)
- ½ tbsp potato starch (katakuriko) (or cornstarch)
- ½ tbsp cooking oil
- 1½ tbsp Japanese soy sauce (koikuchi shoyu)
- 1 ½ tbsp mirin
- 1 ½ tbsp sake
- 1 tsp light brown sugar (or regular sugar)
- 1 ½ tbsp dashi stock (or water with a pinch of dashi granules)
- ½ tsp honey
- Place 450 g boneless chicken thigh on a cutting board with the flesh-side facing up, make horizontal incisions on the thickest parts and open them so that the meat is an even thickness all over.
- Flip the chicken and pierce the skin all over with a fork. Sprinkle with 4 pinches salt on each side and rub until evenly covered.
- Pat the surface dry with kitchen paper. For the traditional method, thinly dust the underneath with ½ tbsp potato starch (katakuriko), brushing off any excess. For the extra crispy method, dust the skin with starch instead.
- Thoroughly preheat the pan on medium, add a generous splash of oil and swirl until evenly coated. Place the chicken with the skin-side down and fry for 7 minutes.
- For the crispy method, cover the chicken with foil and weigh down with a heatproof, flat-bottomed object, like a pan filled with water.
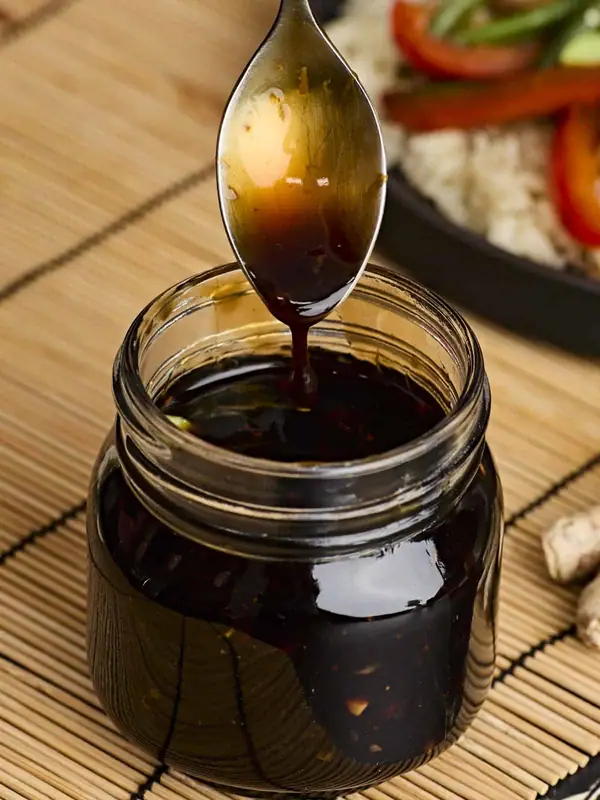
- While you wait, take a small bowl and add 1½ tbsp Japanese soy sauce (koikuchi shoyu), 1 ½ tbsp mirin, 1 ½ tbsp sake, 1 tsp light brown sugar, 1 ½ tbsp dashi stock and ½ tsp honey. Mix until the sugar and honey have dissolved.
- Flip the chicken and fry for 2 minutes on the other side.
- Briefly transfer the chicken to a plate. Carefully pour the rendered fat into a heatproof container and save it for another recipe. Leave about 1 tbsp worth of fat in the pan, and use kitchen paper to wipe excess if needed.Turn off the heat and pour the teriyaki sauce mixture into the pan, scraping any bits of fond off the bottom with a wooden spatula.
- Turn on the heat once more, this time to medium-high. Let it bubble for about 60 seconds, than place the chicken back in the pan with the skin side facing up.
- Baste with the sauce for 30-60 seconds, or until it reaches a syrup-like consistency that clings to the surface of the chicken.If you want to preserve the crispy skin, skip the basting and just move the chicken around the pan until the underneath has a glossy coat.
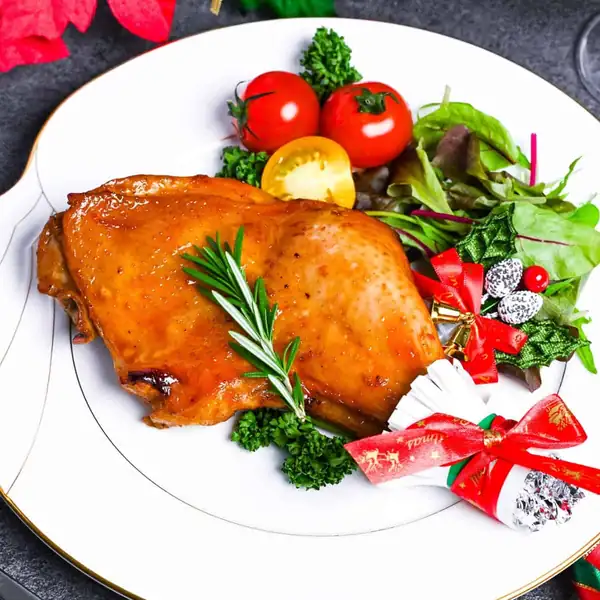
- Remove from the heat and rest for 3 minutes to allow juices to redistribute before cutting into strips. Plate up and pour any leftover glaze over the top. Enjoy!
Featured Comment
Finally, the perfect teriyaki recipe! It’s AUTHENTIC, simple teriyaki without any extraneous ingredients and with the perfect ratio.
It’s absolutely delicious! Thank you so much, we’ve made this many times now and love it.
★★★★★ Sushi, ramen, tempura, miso soup, yakitori… you’ve probably heard them all.
But teriyaki chicken holds its own, with less fuss and just one pan. This recipe shows Japanese authentic glaze method. Once you know it, busy weeknights feel a lot lighter.
Authentic Teriyak Chicken
- What is it? Authentic Crispy-Skin Teriyaki Chicken Thighs
- Flavor profile: Sweet, Savory, Umami-Rich
- Why you’ll love this recipe: You’ll love how this recipe delivers a homemade Japanese favorite in under 30 minutes without sacrificing flavor or requiring tricky steps.
- Must-haves: (ingredients or tools)
- Skill Level: Easy
- Suitable for Meal Prep? Partially with trade-offs.
Summarize & Save this content on: Teriyaki chicken (照り焼きチキン) is a Japanese classic where chicken is pan-cooked in a glossy glaze made from just four core ingredients: soy sauce, sake, mirin, and sugar.
No marinating required for the Japanese method. Just simmer the sauce until it thickens and coats the chicken beautifully.
That’s the “teri (照り),” or shine, that makes teriyaki so tempting. In Japan, yellowtail teriyaki is the most traditional version, but chicken has become a family favorite for its juicy, satisfying bite.
You’ll also find variations like teriyaki salmon for a lighter option or even playful twists like teriyaki pizza. And if you don’t have sake or mirin, no worries!
You can still get delicious result with my mock teriyaki recipe without using sake and mirin. For more ideas, check out my collection of teriyaki dishes.
- Boneless chicken thigh: This is the classic cut for Japanese teriyaki. Prefer leaner chicken breast? Butterfly to even thickness and lightly score or pierce so it cooks fast and stays tender. The trade-off is a cleaner taste but less succulence, so don’t overcook.
- Teriyaki basics: Japanese teriyaki is a simple mix of soy sauce, mirin, sake, and sugar (2:2:2:1 golden ratio). I like swapping in honey for some of the sugar, but all in sugar works perfectly.
- Dashi Stock: If you’ve got leftover dashi from another recipe, use that. Don’t stress about making dashi from scratch or using dashi packet. Just whisk a pinch of dashi granules into warm water. You’re only using a small amount for this recipe.
- Mirin Substitutes: Mix sugar with white wine or dry sherry for that sweet-tangy balance, or just use sugar and water for alcohol-free. Surprisingly, cola makes a great 1:1 swap thanks to its complexity.
- Sake Alternatives: White wine or dry sherry substitute fine.
- Going Alcohol-Free: Need to skip both mirin and sake? Check out my alcohol-free teriyaki chicken recipe.
- Potato Starch Substitute: Cornstarch works just as well for coating the chicken.
Have trouble finding Japanese ingredients? Check out my ultimate guide to Japanese ingredient substitutes! If you prefer to watch the process in action, check out my YouTube video of this teriyaki chicken recipe!
i. Place boneless, skin-on chicken thighs skin-side down on a board.
Make a shallow horizontal cut through the thickest parts to create a flaps, then open them so the piece is an even thickness throughout for uniform cooking and juiciness. Even thickness prevents dry edges and undercooked centers. Use large bite-size pieces (3-4 cm / 1¼-1½ in).
Sear skin-side pieces 3-4 minutes, flip 2 minutes, then glaze as instructed later just like I did for teriyaki chicken bowl and yakitori don. Always verify the center reaches at least 74-75℃ (165-167°F) for safety.
ii. Flip the thigh skin-side up and lightly prick the skin all over with a fork.
Those tiny fork holes let the fat render out more easily, preventing the skin from puffing up like a balloon. iii.
Pat the surface dry with paper towels. It might seem like a small detail, but moisture is the enemy of crispy skin.
Plus, a dry surface helps the sauce stick better. iv.
Then, season both sides with a good pinch of salt and gently rub it in. Important Note: From here, I’ll introduce two different methods: the Traditional Method, which coats both sides of the chicken with glaze, and the Extra Crispy Method, which crisps up the skin side and preserves that crunchy texture. Since there are differences in a few steps, I’ve marked the extra crispy method steps with (e) for easy reference.”
i. Sift a very thin veil of potato starch over only the flesh side, and tap off any excess.
This micro-coating traps surface juices, guards the meat against harsh pan heat, and gives your glaze something to cling to. i (e).
The extra-crispy method flips the script and dusts the skin side instead. Potato starch creates more transparency and shine, perfect for teriyaki’s glossy finish.
Cornstarch works too, offering slightly less gloss but more stability. i. Heat your empty pan well.
Add oil and swirl to coat, reduce the heat slightly, then place the chicken skin-side down and cook for 7 minutes without moving it. ii (e).
For even crispier results, place a sheet of aluminum foil over the chicken. iii (e).
Then set a moderately heavy, flat-bottomed object on top, like a second pan filled with water like I did for my ponzu chicken recipe. Cook for 7 minutes.
This gentle pressure eliminates air pockets, ensuring every millimeter of skin makes contact with the pan for incredibly even crisping. The weight also prevents the skin from curling up at the edges.
i. While it cooks, combine soy sauce, mirin, sake, light brown sugar, dashi stock, and honey in a small bowl.
Stir until the sugar and honey dissolve so the glaze reduces smoothly later. Glutamate from soy/dashi and inosinate from chicken amplify one another, boosting savoriness far beyond either alone. i.
Flip the chicken and cook the other side for 2 minutes. ii.
Then transfer it briefly to a plate. iii. Pour off all but about 1 tbsp of rendered fat into a heatproof cup to keep the glaze bright, not greasy.
Save that golden chicken fat for fried rice or shoyu ramen later. Removing excess fat improves emulsion stability and lets the glaze cling rather than separate.
Deglazing dissolves the caramelized “sucs” into the sauce for depth. iv.
With the heat off, pour in the sauce and scrape up the browned bits (fond/sucs) with a spatula. Those concentrated drippings supercharge flavor.
i. Return the pan to high heat and bring the sauce to a brisk simmer for 60 seconds.
ii. For the classic method, nestle the chicken back in skin-side up and baste constantly until the sauce thickens enough to coat the back of a spoon, about 30-60 seconds more.
ii (e). For the extra-crispy version, we leave the skin alone and move the chicken around the pan without flipping until the glaze has thickened so that it coats only underneath. iii.
Turn off the heat to avoid over-reduction. iv.
If it’s still thin, pull the chicken out and reduce the sauce a bit longer. If it’s getting too syrupy, add a splash of water or sake.
i. Transfer the chicken to a cutting board skin-side up and rest 3 minutes so juices redistribute.
ii. Slice time!
It’s easier skin-side down, but skin-side up preserves crispness. Choose your priority. iii.
Spoon the remaining glossy glaze in the pan over the surface of the chicken. iv.
Serve with freshly cooked Japanese rice.
- Always even out the chicken thigh’s thickness before cooking so it cooks through without dry edges or raw spots.
- Drain off excess chicken fat before adding the sauce so the glaze clings instead of turning greasy.
- Always check the thickest part reaches at least 74℃ (165°F) for safe doneness.
- If the sauce isn’t thick enough, remove the chicken from the pan and continue to simmer until it reaches your desired consistency.
- If the sauce gets too thick, add a splash or water or sake (a little at a time) and mix thoroughly to loosen it up.
With these simple tips in mind, you’re set for success every time you make Japanese teriyaki chicken. Fridge: Store cooled chicken in an airtight container for 2-3 days.
Keep in mind that the glaze will solidify and the skin will lose its crispness. Freezer: Freeze portions in airtight containers or freezer bags for up to 2-3 weeks.
Meal Prep: Cook rice, mix the sauce, prepare the chicken (cutting, piercing, and drying) up to 24 hours ahead and store covered in the refrigerator. Reheating: Reheat thawed or chilled chicken in a skillet over medium heat until piping hot throughout, spooning any leftover glaze over to refresh shine.
An oven or air fryer works too. Why did my teriyaki sauce burn and turn black? The heat was too high or the sauce was added too early.
Reduce the heat if it looks like it’s scorching. You can always pull the pan off the heat and let residual heat finish the glazing too.
If it does burn, rescue the chicken immediately, deglaze the pan with water, and make fresh sauce in a separate pot. My teriyaki chicken is too greasy. How do I avoid this?
Always remove excess rendered fat from the pan before adding sauce, leave only about 1 teaspoon. If it’s already greasy, serve with acidic sides like pickled vegetables or add a squeeze of lemon juice to cut through the richness. Can I make this teriyaki sauce separately to avoid burning?
Absolutely! This isn’t a traditional method, but it’s definitely foolproof. You can keep the chicken skin crispy too.
Just cook the sauce without the chicken and brush or spoon it over the hot chicken. I don’t have sake. Should I just use Shaoxing rice wine to make teriyaki sauce?
You can use Shaoxing wine instead of sake, but keep in mind that their flavors are quite different. I’d suggest using half the amount of Shaoxing at first.
Another option is to use dry white wine or dry sherry! Is there a way to make teriyaki chicken without alcohol (sake and mirin)?
Yes, if you can’t get all these ingredients or don’t want to use alcoholic condiments, check out my Easy Mock Teriyaki Without Using Sake and Mirin recipe! So authentic Japanese teriyaki chicken isn’t marinated?
I realize using pre-made teriyaki sauce or marinade to make teriyaki chicken outside Japan is common. Don’t get me wrong, there’s nothing wrong with it.
However, the authentic way does not use pre-made sauce or marinade because teriyaki is not considered a sauce but a cooking method. The four vital ingredients in the “teriyaki method” are soy sauce, sake, mirin, and sugar.
- Pork Chop Teriyaki with Lemon
- Teriyaki Beef Rice Bowl with Wasabi Twist
- Quick and Easy Teriyaki Cod
- Teriyaki Tofu Donburi
Craving more Japanese flavors? Check out these easy teriyaki recipes that are perfect for busy weeknight meals! The ingredient brands and tools I trust are in my Japanese pantry guide and my cooking tools guide.
Can’t find certain Japanese ingredients? See my substitution guide here.