Oven Roasted Chicken Breasts
I really like having pre-cooked chicken in the fridge that I can use to quickly whip up a sandwich or wrap, or add protein to a bowl of pasta, salad, or one of my “leftovers” bowls.
- 2 split chicken breasts (bone-in & skin-on, (about 2 lbs total) $5.74)
- 3 Tbsp butter (room temperature, $0.34)
- 2 garlic cloves (minced, $0.12)
- 1 tsp dried basil ($0.04)
- 1 tsp dried thyme ($0.03)
- 1 tsp dried rosemary (chopped or crumbled, $0.04)
- ½ tsp salt ($0.02)
- ½ tsp black pepper (freshly cracked, $0.08)
- Gather and prepare all ingredients. Preheat the oven to 275ºF. Remove the chicken from the refrigerator and allow it to warm slightly as you prepare the butter herb mix (5 minutes or so).
- In a small bowl, stir together the butter, minced garlic, basil, thyme, rosemary, salt, and pepper.
- Place the chicken on a cutting board and pat it dry on both sides with a clean paper towel. Smear the butter herb mixture over both sides of the chicken. Drying the meat will help the butter herb mixture stick. If the meat is too cold, it will form condensation as you rub the butter mixture over the surface and the butter will not stick.
- Place the seasoned chicken pieces in a casserole dish that is deep enough to fully contain the chicken. Cover tightly with foil, or with the dish's lid if there is one. Bake the chicken in the preheated oven for 90 minutes, basting once half way through.
- Ater 90 minutes, remove the foil, baste again, and adjust the oven's temperature to 425ºF. Bake the chicken at 425ºF for 20 minutes without the foil, or until the skin is deep golden brown and crispy. The internal temperature should be 165ºF once fully cooked. Remove the chicken from the oven and let rest for 5-10 minutes.
- Slice the breasts or pull the meat from the bone. Reserve the juices from the bottom of the casserole dish for drizzling over top of the meat.
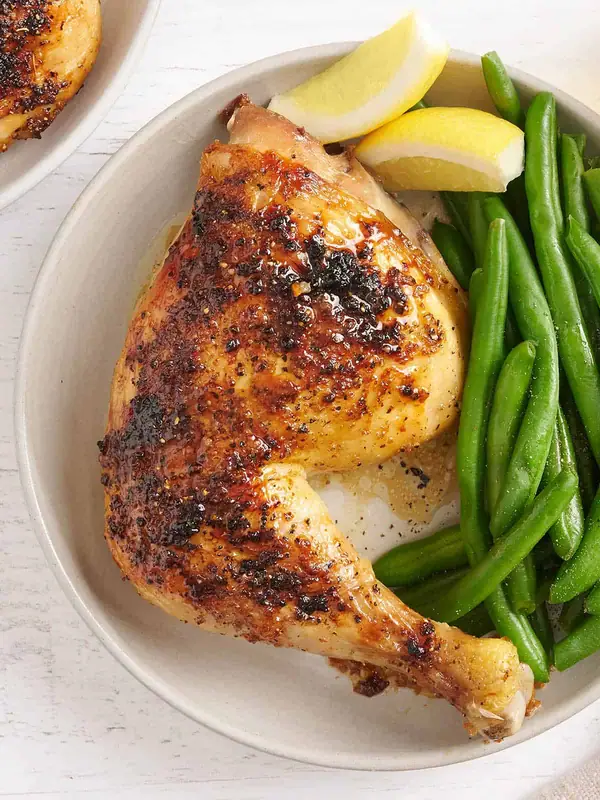
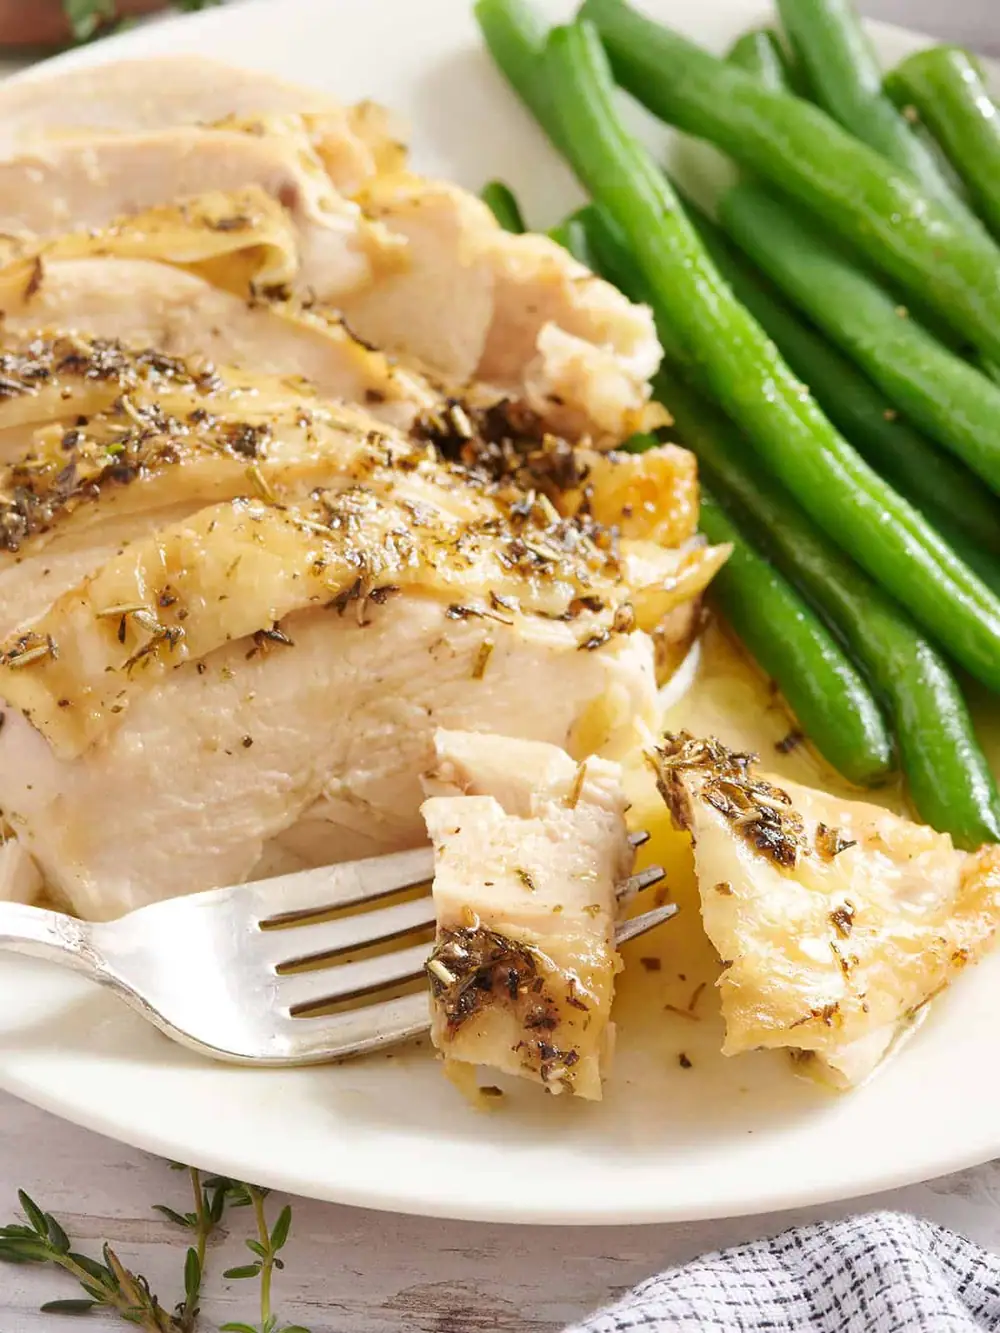
While I often use a rotisserie chicken for this purpose, they are sometimes just too salty, and we have a hard time going through a whole chicken between the two of us. So, this roasted chicken breast method solves that problem. The low and slow roasting method makes these herb roasted chicken breasts turn out incredibly tender and juicy, with flavorful pan juices that make the leftovers just as good as the first night!
All recipes are rigorously tested in our Nashville Test Kitchen to ensure they are easy, affordable, and delicious. “This has been my favorite chicken method since I found it on Pinterest many months ago.
Even the pickiest eaters have picked all the meat off the bones! It takes time, but very little effort and the leftovers are lovely. It’s the kind of method that you love to share, but in addition want to keep top secret!!”
Herby and Easy Roasted Chicken Breasts
I first used the “low and slow” technique with my oven roasted chicken legs and was really pleased with not only the texture of the meat, but the delicious juices that were left in the dish after roasting. This time I combined the butter with a trio of herbs and slathered it over two bone-in, skin-on split chicken breasts.
The breasts were quite large, so I lowered the heat a bit and let them roast even longer before removing the cover to let them brown. The results were even more incredible.
I pulled the meat from the breasts after preparation, drizzled the juices over top, and have been snacking on the meat all week.
Recipe Success Tips
- Use bone-in, skin-on chicken breasts.
The bone acts like insulation during the low-and-slow roast, helping the meat cook gently and stay juicy the whole way through. The skin adds taste and fat and gives us those rich pan juices at the end. This method really is designed for bone-in, skin-on breasts.
As written, it’s not suitable for boneless breasts, but I’ve included notes in the recipe card if you want to adapt it. And if you’ve got a whole chicken instead, I recommend following our whole roasted chicken method for the best results! - Pat the chicken dry before seasoning.
I used to skip this step, but it matters more than you’d think. Dry skin helps the butter stick evenly, which means better savor coverage and more consistent browning later. - Check doneness the right way.
Chicken is fully cooked at 165°F, but be careful not to hit the bone with your meat thermometer when checking the temperature. The bone runs hotter and can give you a false reading.
Aim for the thickest part of the meat instead. - You don’t need to brine this chicken, but you can if you want extra juicy results. A simple brine of ¼ cup kosher salt, ¼ cup sugar, and 2 quarts cold water works great (just like we do in our baked chicken breast method).
Brine it for 30 minutes in the fridge before rinsing and patting dry. - Buying chicken on a budget. Family packs are usually the cheapest per pound.
I acquired a pack of four breasts, cooked two, and froze the rest for another method later. It saves money, and future-you will be very grateful! You can make this dish even faster and easier!
Just follow the technique used in my pressure cooker chicken and rice method (cook the chicken at high pressure for 30 mins with 2 cups of water, release the pressure naturally, then broil to brown the skin).
Roasted Chicken Breasts
- 2 split chicken breasts (bone-in & skin-on, (about 2 lbs total) $5.74)
Herb Butter
- 3 Tbsp butter (room temperature, $0.34)
- 2 garlic cloves (minced, $0.12) - 1 tsp dried basil ($0.04) - 1 tsp dried thyme ($0.03)
- 1 tsp dried rosemary (chopped or crumbled, $0.04) - ½ tsp black pepper (freshly cracked, $0.08) - Gather and prepare all components.
Preheat the oven to 275ºF. Remove the chicken from the refrigerator and allow it to warm slightly as you prepare the butter herb mix (5 minutes or so). - In a small bowl, stir together the butter, minced garlic, basil, thyme, rosemary, salt, and pepper.
- Place the chicken on a cutting board and pat it dry on both sides with a clean paper towel. Smear the butter herb mixture over both sides of the chicken.
Drying the meat will help the butter herb mixture stick. If the meat is too cold, it will form condensation as you rub the butter mixture over the surface and the butter will not stick.
- Place the seasoned chicken pieces in a casserole dish that is deep enough to fully contain the chicken. Cover tightly with foil, or with the dish’s lid if there is one. Bake the chicken in the preheated oven for 90 minutes, basting once half way through.
- Ater 90 minutes, remove the foil, baste again, and adjust the oven's temperature to 425ºF. Bake the chicken at 425ºF for 20 minutes without the foil, or until the skin is deep golden brown and crispy. The internal temperature should be 165ºF once fully cooked.
Remove the chicken from the oven and let rest for 5-10 minutes. - Slice the breasts or pull the meat from the bone.
Reserve the juices from the bottom of the casserole dish for drizzling over top of the meat. See how we calculate method costs here.
- Preheat the oven to 400ºF. If your boneless, skinless chicken breasts are thicker than ¾-inch at the thickest end, place them on a cutting board, cover with plastic wrap. Pound until they are between ½–¾-inch thick all the way across.
Pat the chicken dry and cover with the herb butter. - Arrange on a baking sheet or in a casserole dish with space between each piece.
Bake for about 20 minutes, or until the thickest part reaches 165ºF. - Let rest for 5 minutes before slicing and serving.
How to Make Herb Roasted Chicken Breast Step-by-Step Photos
Gather all of your components: Begin preheating the oven to 275ºF. Take the chicken out of the refrigerator so it has a few minutes to come up to temperature.
You only need two bone-in, skin-on chicken breasts for this recipe, so I froze the other two for future use. Make the herb butter: In a small bowl, combine 3 Tbsp room temperature butter, 2 cloves minced garlic, 1 tsp dried basil, 1 tsp dried thyme, 1 tsp dried rosemary, ½ tsp salt, and ½ tsp freshly cracked black pepper.
Rosemary pieces can be large, so I just crush them up in my hand before adding them. Stir this mixture up until it forms a paste.
Dry the chicken: Place two split chicken breasts (bone-in, skin-on, about 2 lbs. total) on a cutting board and pat them dry with a paper towel. They need to be fairly dry for the butter to stick.
In addition, if the chicken is too cold, they will form condensation and become wet again, which is why you’ll want them to warm a bit as you mix the butter. Add the butter: Place the seasoned chicken breasts in a casserole dish that is deep enough to fully contain the chicken.
Spread the butter herb mixture over both sides of the chicken, coating it in a thick layer. Roast: Cover the dish tightly with foil (this is important to hold in the moisture), or if the dish has an oven-safe lid, that’s even better.
Roast the breasts in the 275ºF oven for 90 minutes, basting once half way through (replace the foil as tightly as possible after basting). Cooking more than two breasts?
No need to adjust the cook time or oven temperature. Just use a baking dish large enough to hold everything with a little space between each breast so the heat can circulate properly. Crowding the pan can cause uneven cooking.
After the full 90 minutes, remove the foil, baste one more time, and adjust the oven’s heat to 425ºF. Return the chicken to the oven and roast for 20 minutes without the foil, or until the skin is deep golden brown and crispy.
The safe internal temperature for chicken is 165°F once fully cooked. Give it one last baste with those delicious juices for good measure and let the meat rest for 5-10 minutes.
Letting the meat rest a few minutes helps keep the juices inside and the meat nice and moist! Remove the chicken from the bones: You can either do this by running a knife against the bone or…
…once cooled enough to handle, use your hands to separate the chicken from the bones. And don’t forget to pull any bits and pieces of meat left on the bones, like you would with a rotisserie chicken.
It’s just too good to let any go to waste! After I removed all the meat from the bones, I gave it another good dose of those delicious juices. Slice or shred your chicken, and enjoy!
It makes an impressive main dish, but I’m just adding a few pieces to everything I eat this week! Depending on how you serve it and how big your chicken pieces are, you’ll get 4-6 servings. Make sure to save those juices and pour them over top before stashing it in the fridge!
Serving Suggestions
Meat and potatoes are always going to be a match made in heaven, so I love these roasted chicken breasts with a side of mashed potatoes (you’ve GOT to drizzle some of the pan juices over your mash). Then I’d add another veggie to my plate.
Green beans or roasted broccoli are nice, but if you want something a little extra, Tennessee onions make a great special-occasion side. For leftovers, this chicken is a meal prep dream. I’ll chop or shred it and add it to a pot of soup, like our marry me chicken soup, where it warms through and stays tender.
It’s in addition great for bowl meals. I love using it to make our loaded cauliflower bowls even more loaded.
A little herby roast chicken breast goes a long way, which makes this recipe just as useful after dinner as it is the first night.
Storage, Reheating & Meal Prep
This roasted chicken breast method is especially great for storing, freezing, and meal prepping.
Once the chicken has cooled, I like to pull the meat from the bones and store it in an airtight container with a spoonful or two of the pan juices to keep everything moist. It will keep well in the fridge for up to 3-4 days and reheats gently without drying out.
For longer storage, portion the chicken into freezer-safe containers or bags, again with a little of that liquid gold, and freeze for up to 4 months. To reheat, I usually warm the chicken in a covered skillet or saucepan over low heat with a splash of broth, water, or a spoonful of the reserved pan juices to keep it from drying out.
The microwave works too, just reheat in short bursts and cover it so the steam stays trapped. You can in addition add it straight into sauces, soups, or casseroles and warm it through that way.